
Fogger power reduced
Your cabinet makes fog with three ceramic discs on the fogger. If one or two of the discs stop, the cabinet keeps growing but makes less fog than it should. Poor contact between a disc and its seat is the usual cause. Unscrewing and re-tightening them is often enough to fix it. If the fogger has been running for a longer period, replacement discs might be needed. The steps below take the fogger out so you can do that. Work through them in order.
You may also see some of the following:
The pump runs far more often than it should, several times per hour.
Water overflows from the top tray, and can drip down within the root zone.
Before you start
Keep the cabinet unplugged for all of these steps. Never touch the discs or the streams of water while the fogger is running.
Have the T10 torx-key that came with the cabinet to hand. A T10 screwdriver of your own works too. It fits the two M3 screws on the frame and the two screws holding the fogger.
The discs themselves take the tool included in the fogger disc kit. The wall mounts that came with your Vext also fit.
Keep a towel nearby. The plant wall and the fog tank can both spill water when you take them out.
Step 1: Unplug the cabinet and remove the plant wall
Unplug the cabinet from mains power by pull out either end of the power supply, at the wall or at the bottom of the cabinet.
Take out the two pod holders at the top of the plant wall, then lift the plant wall up and out. Set it down on cardboard, paper, or a towel, since it can be wet and drip.
Step 2: Remove the fog tank
Find the two M3 screws at the top of the frame. Hold the fog tank with one hand and remove both screws with the T10 screwdriver. Once the second screw is out, the fog tank is free and can drop, so keep supporting it. Empty the water before you take the fog tank off the frame, and hold it level so it does not tip.
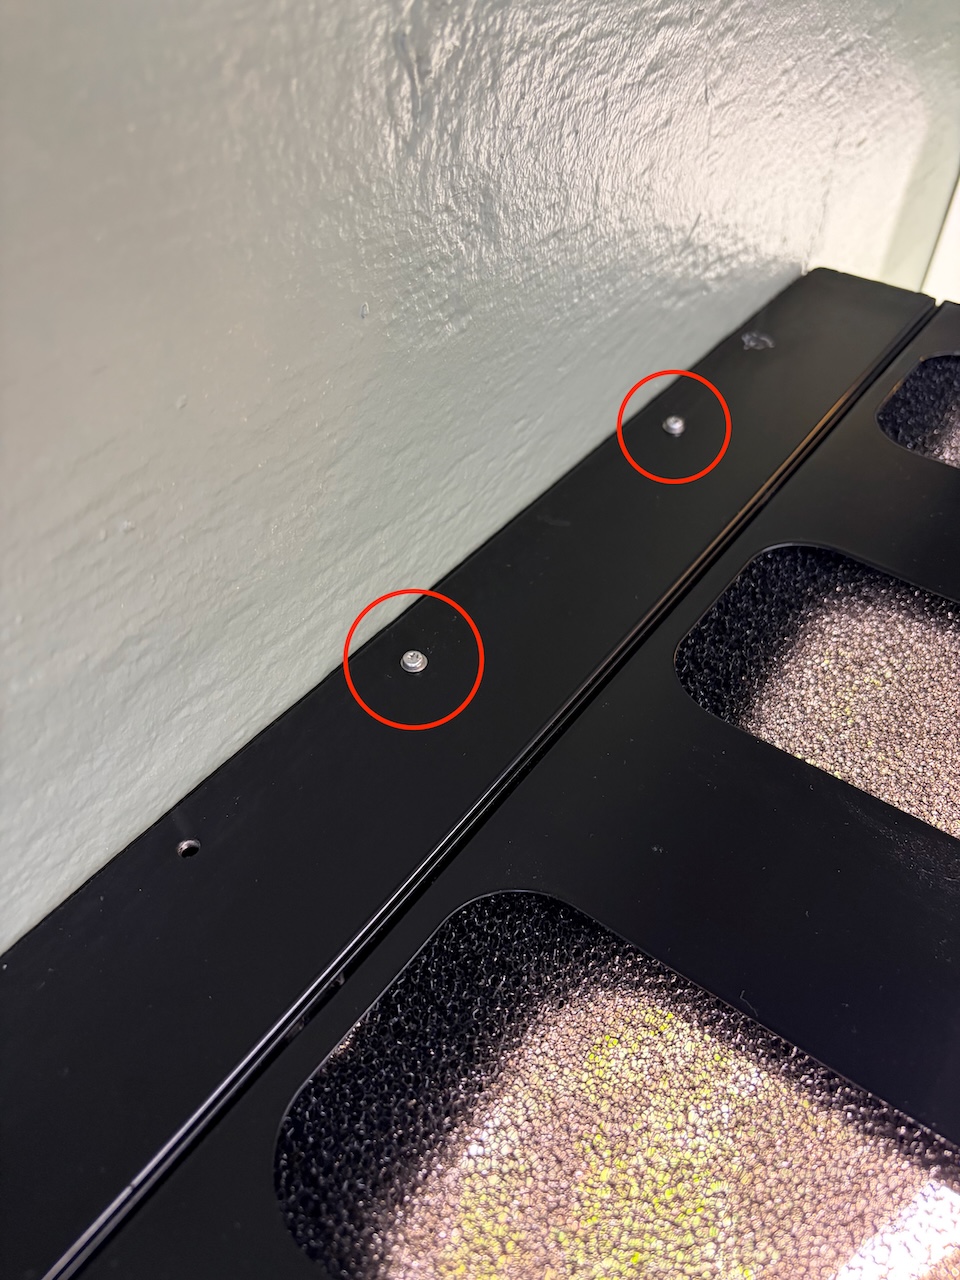
Step 3: Undo the two screws holding the fogger
With the T10 screwdriver, undo the two screws on the left and right of the fogger that hold it in place. These screws stop the fogger from coming loose while the cabinet is moved.
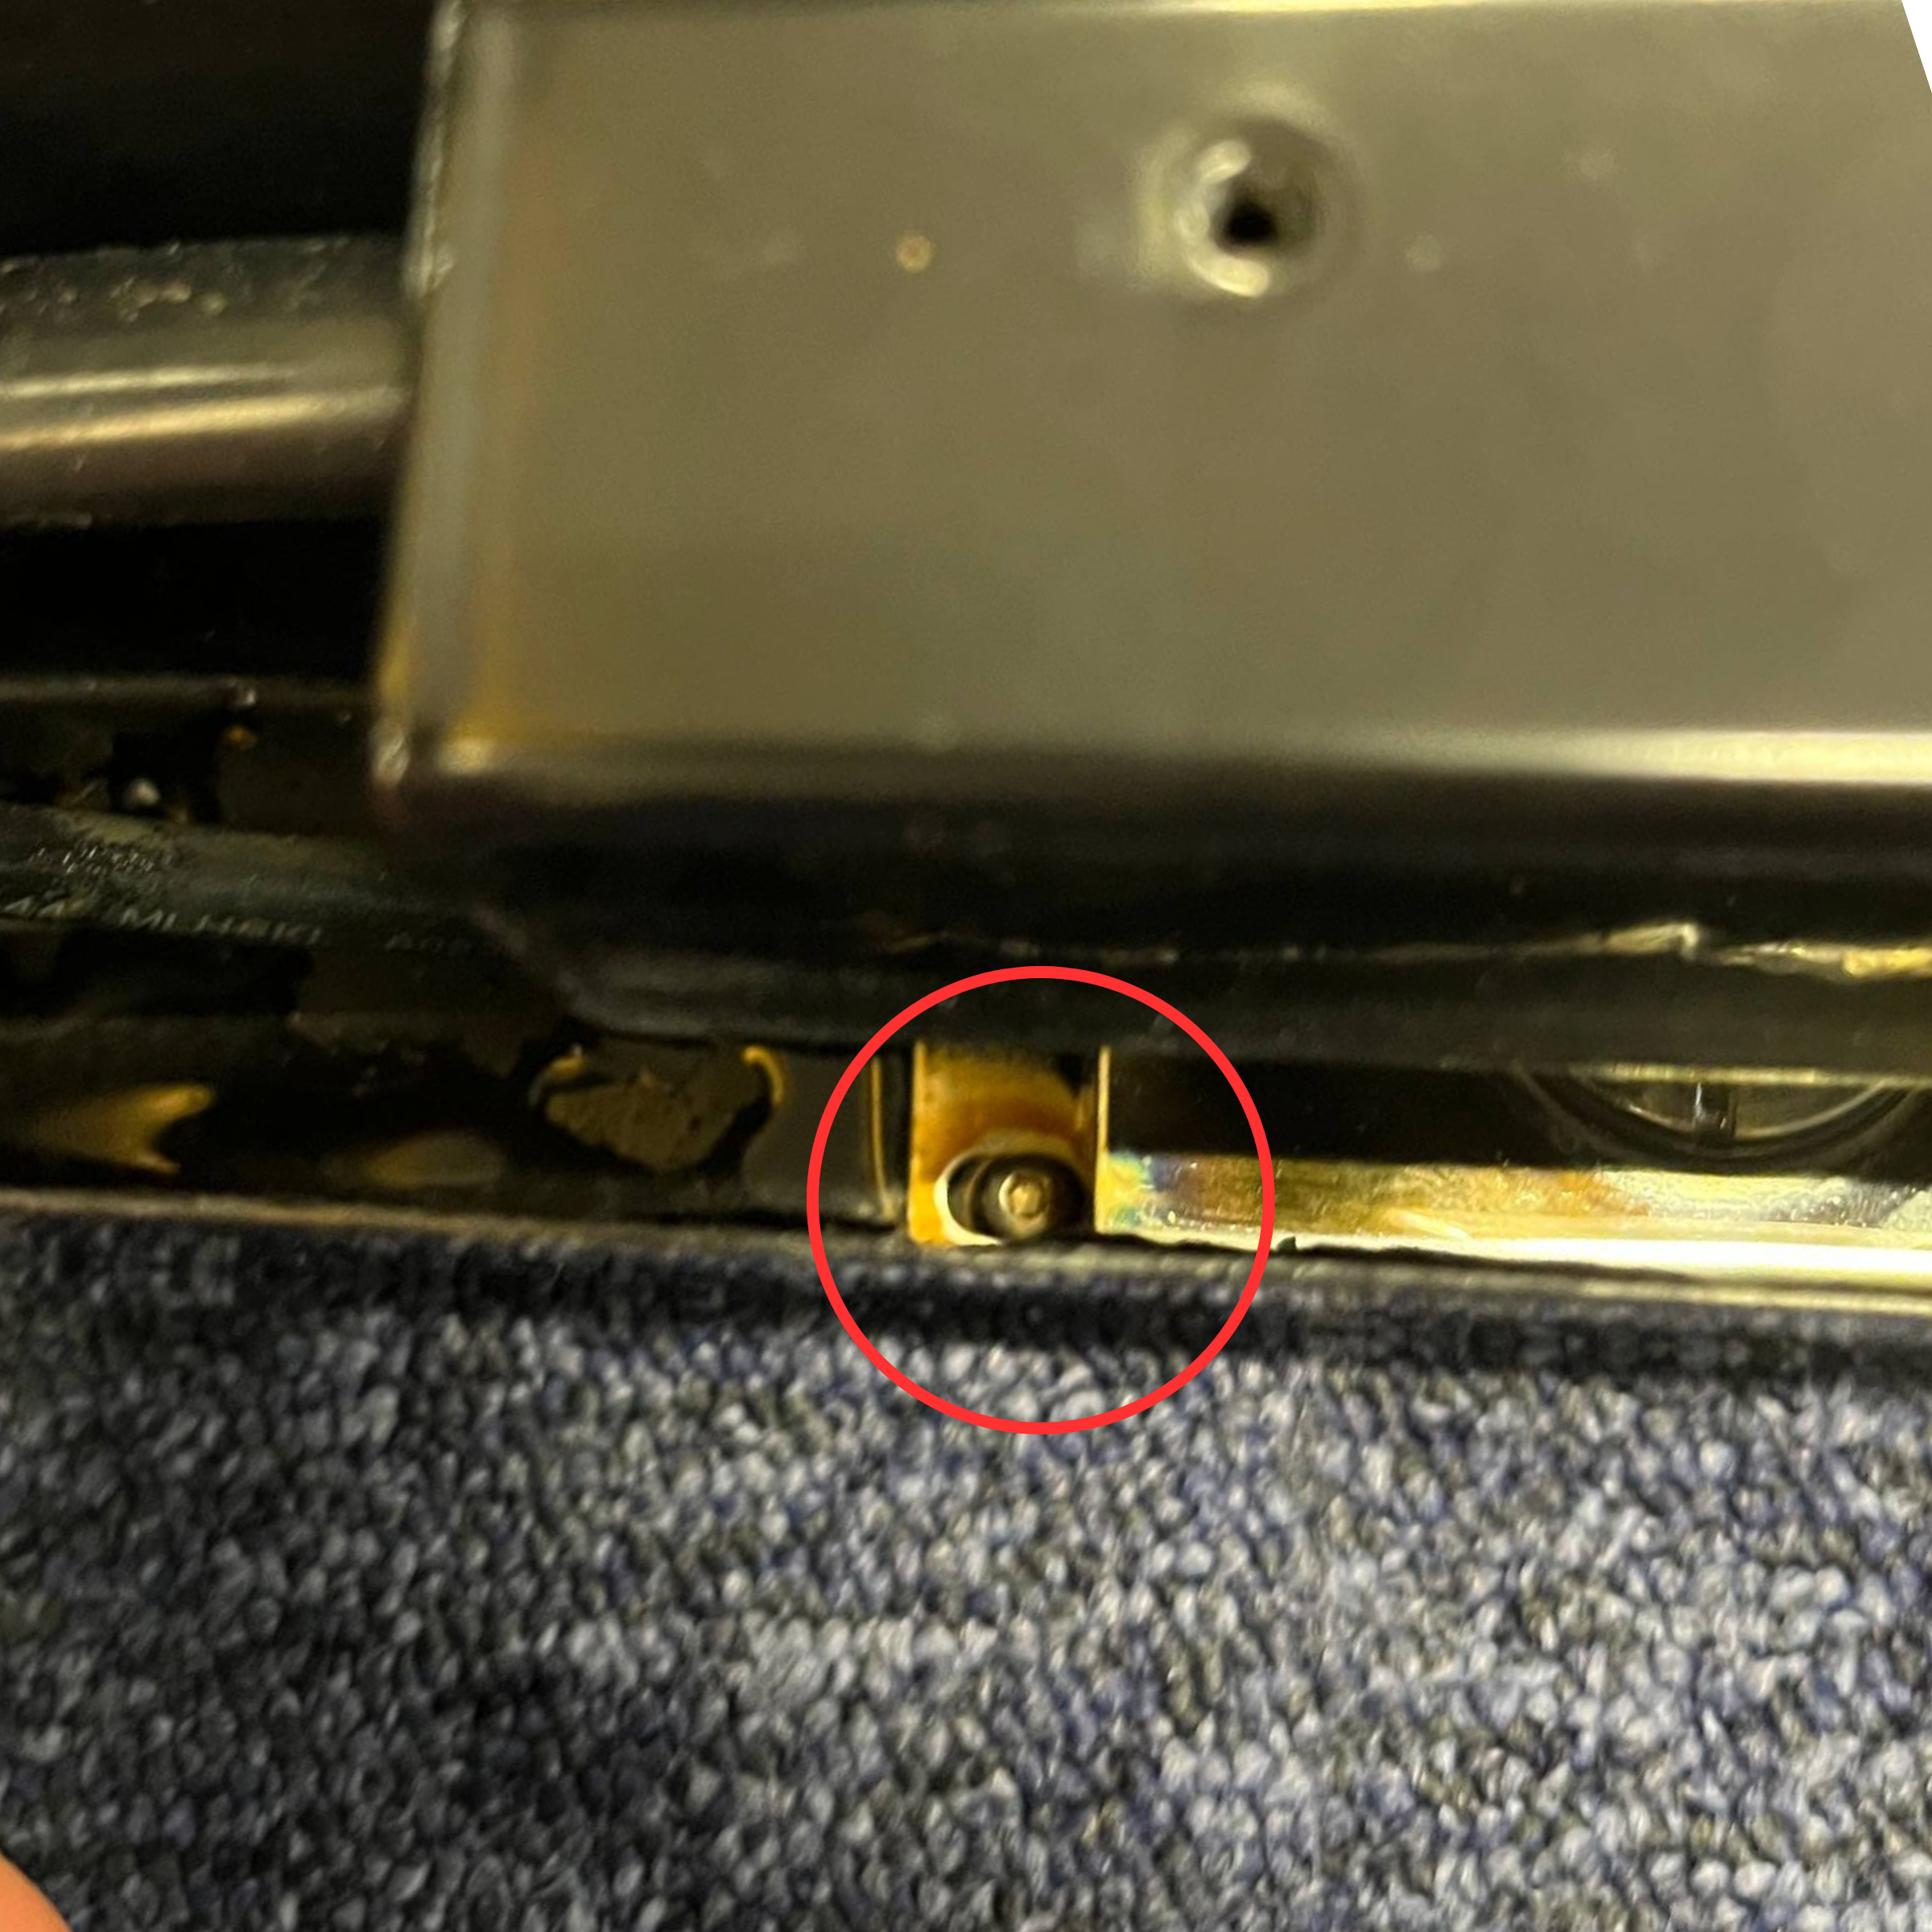
Step 4: Make room for the fogger
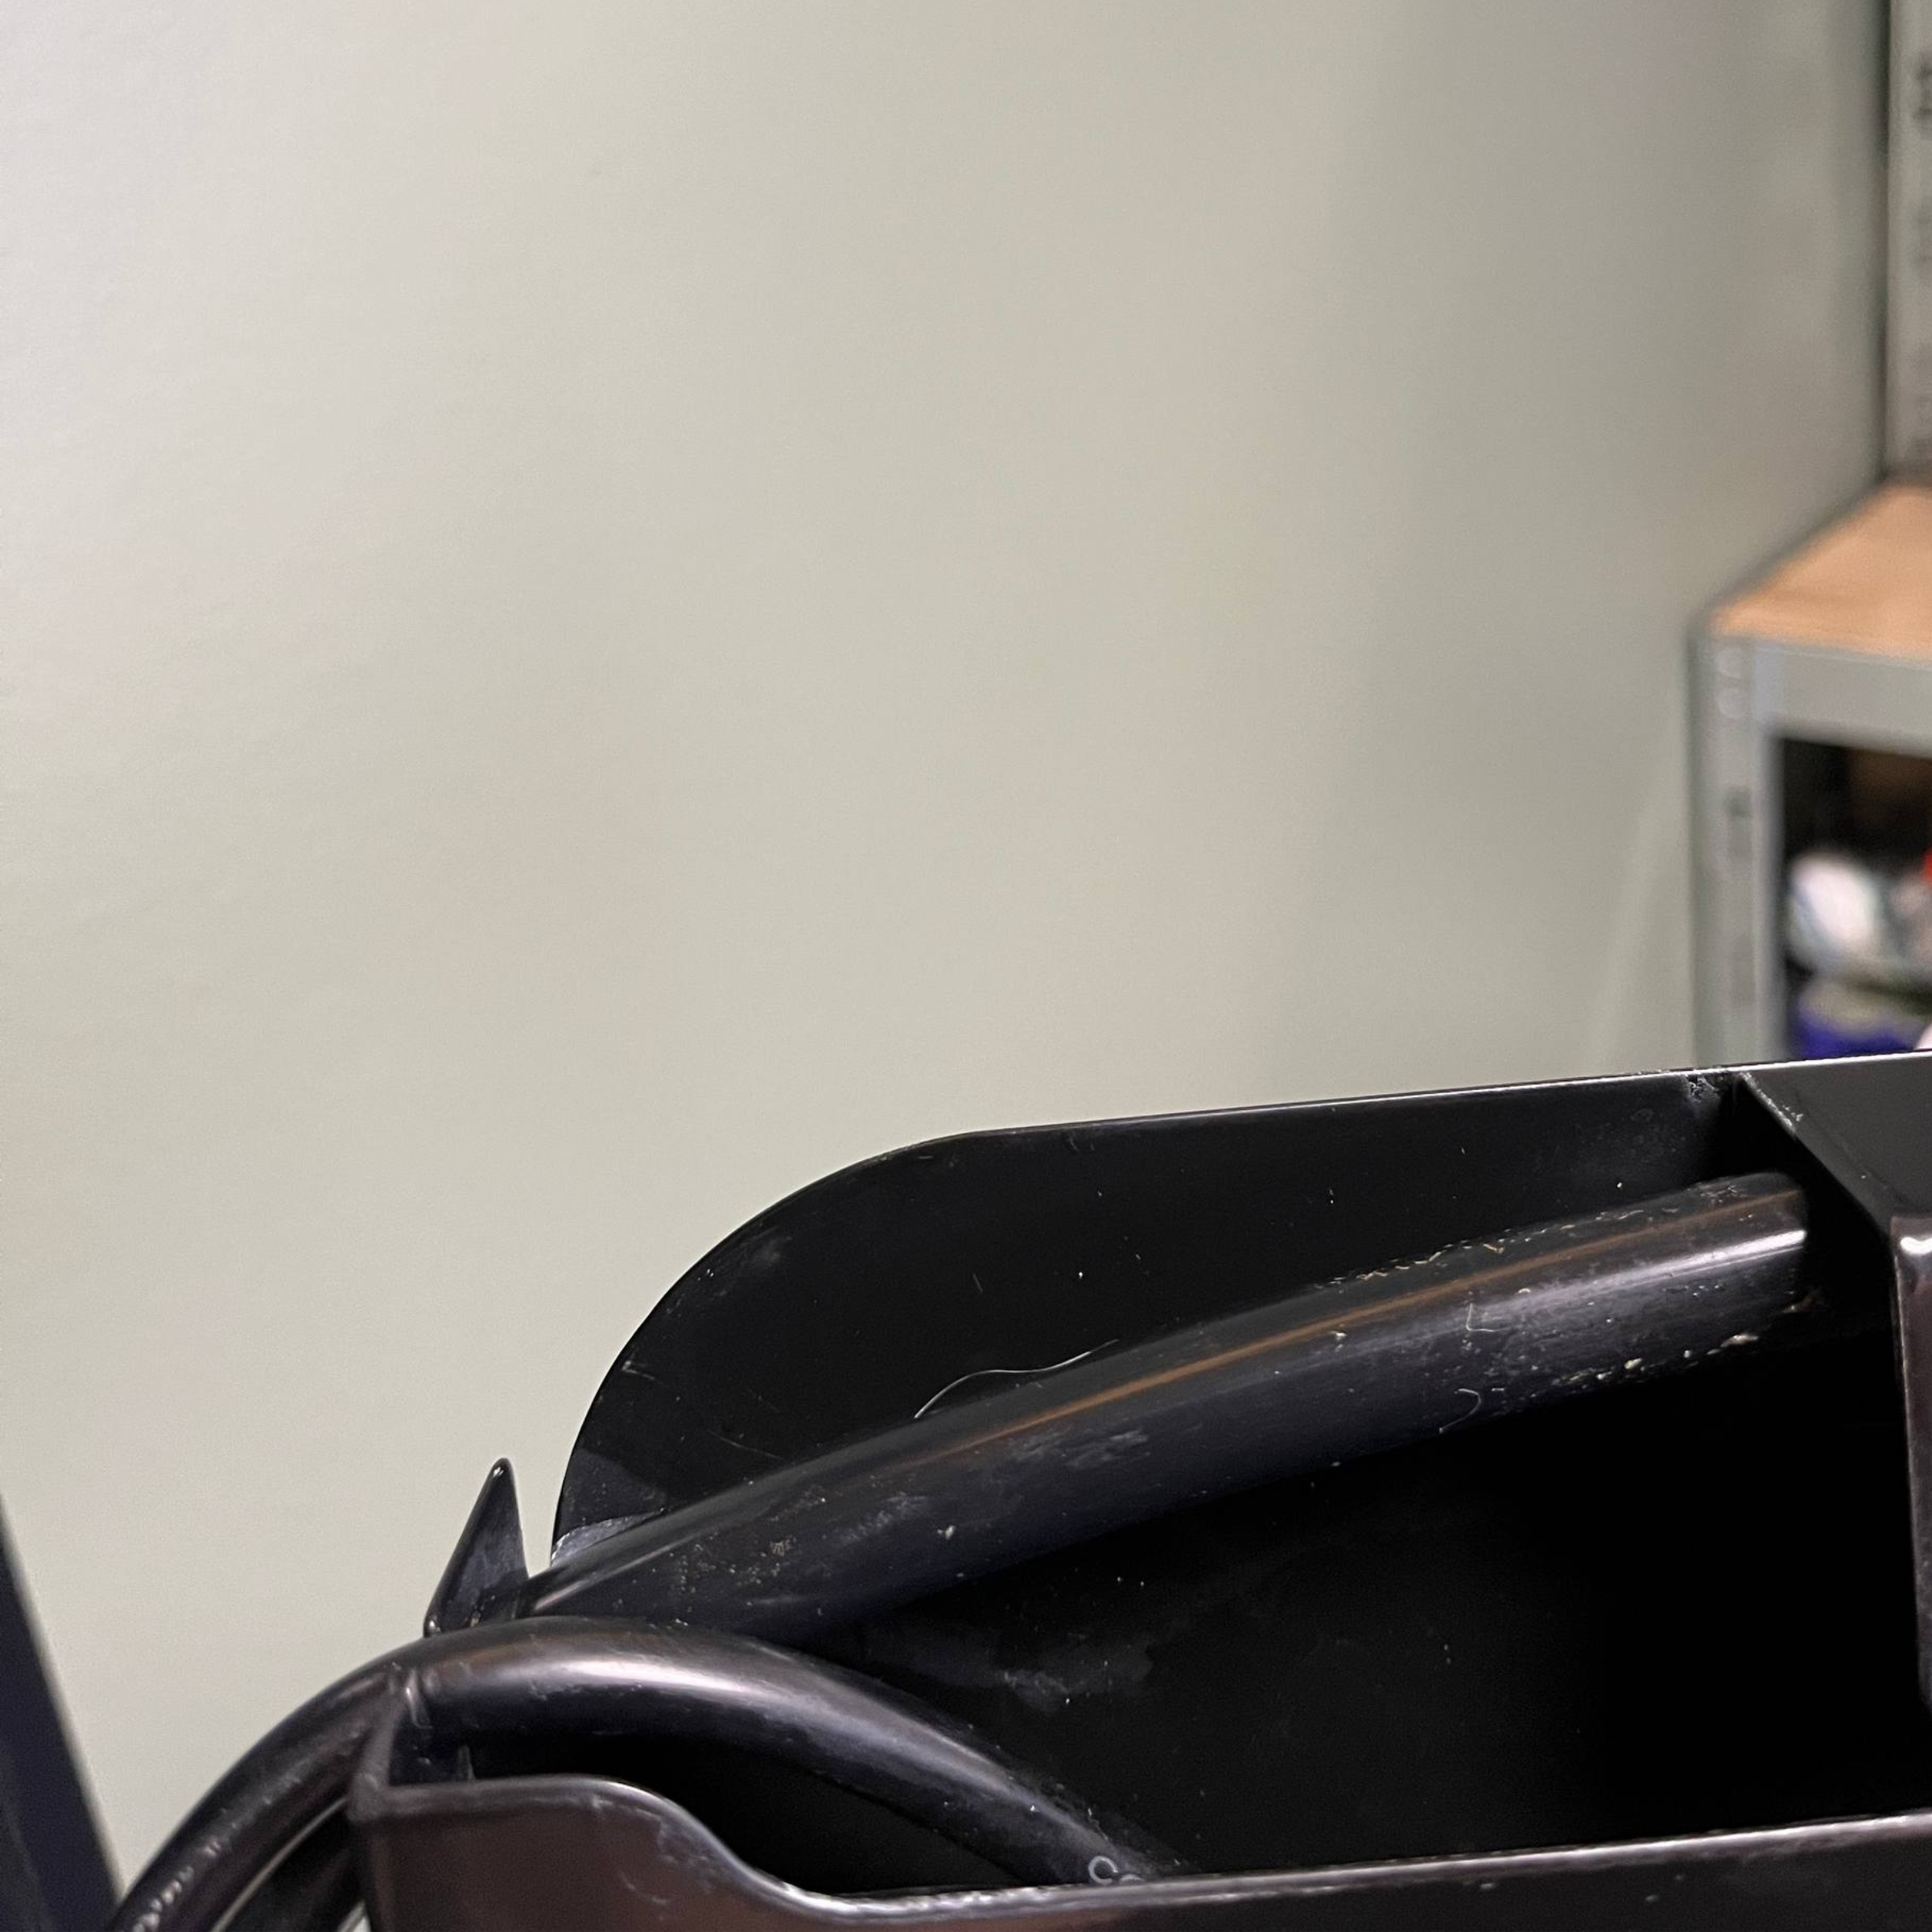
Pull the tube out far enough to give the fogger room to come out.
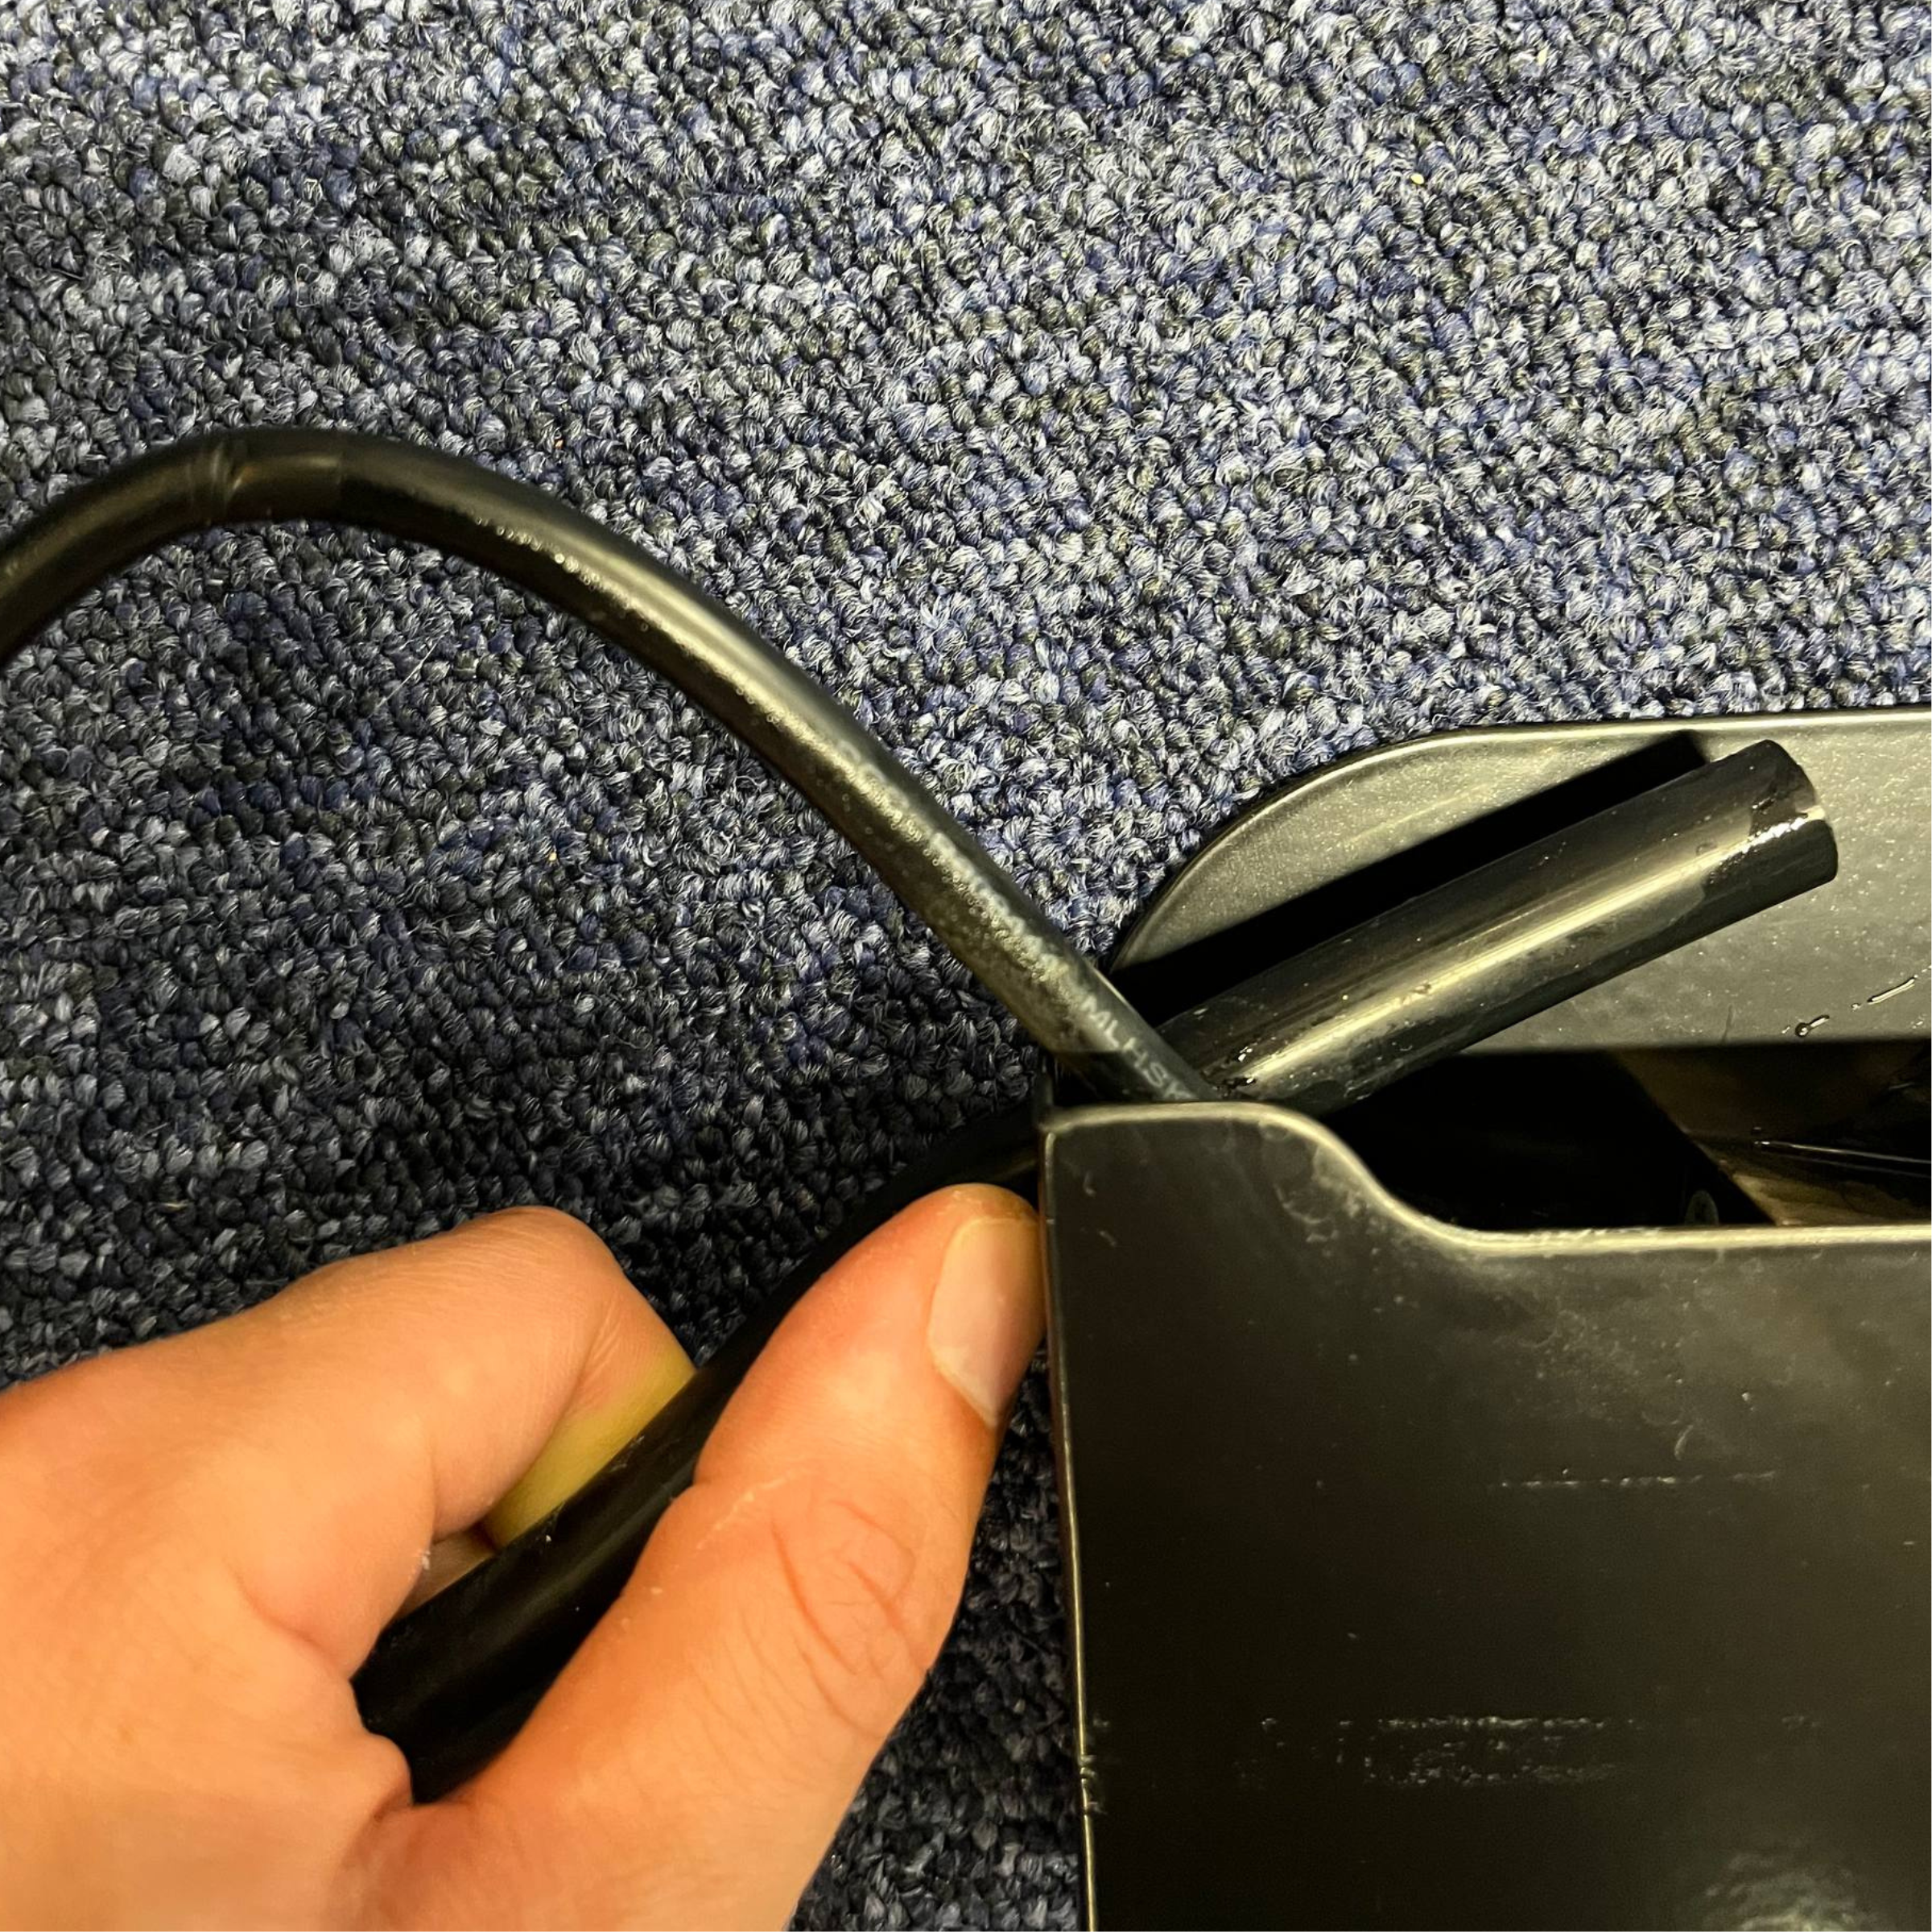
Step 5: Take the fogger out and dry it
Take the fogger out from the left side. The cable stays connected, so set the fogger down where the cable reaches and do not pull on it.
Dry the fogger with a cloth so you can see and handle the three discs.
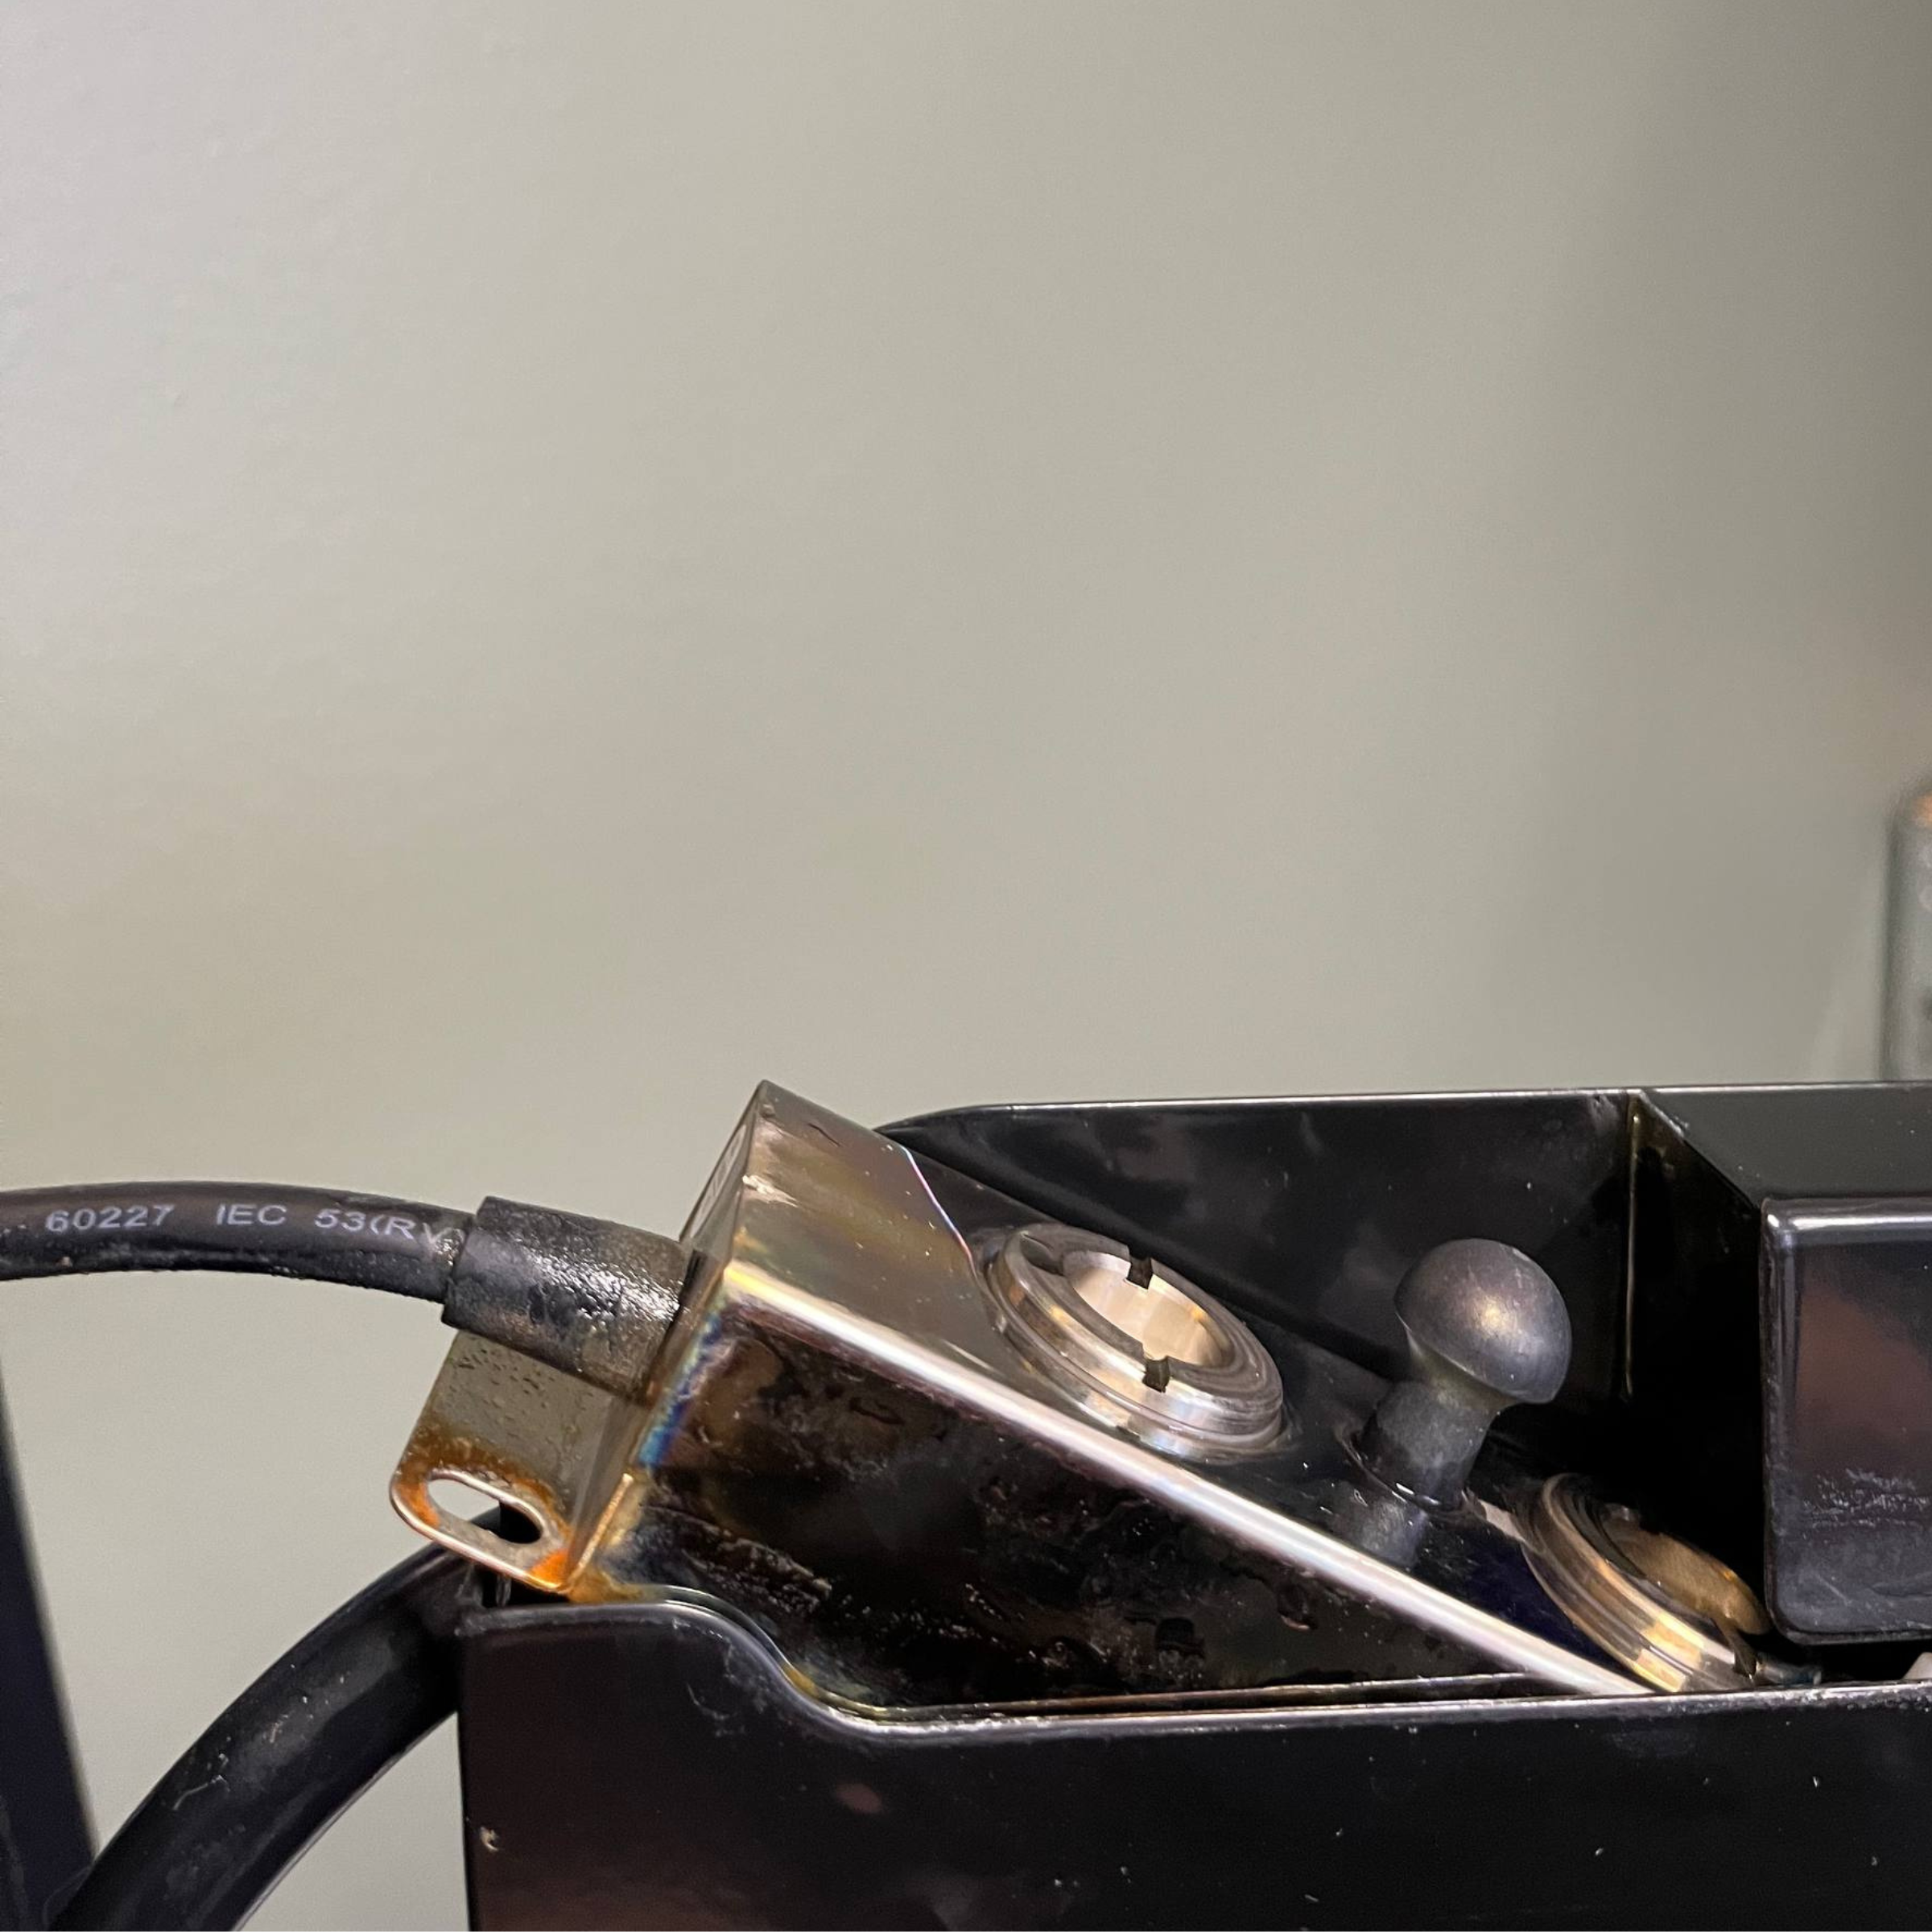
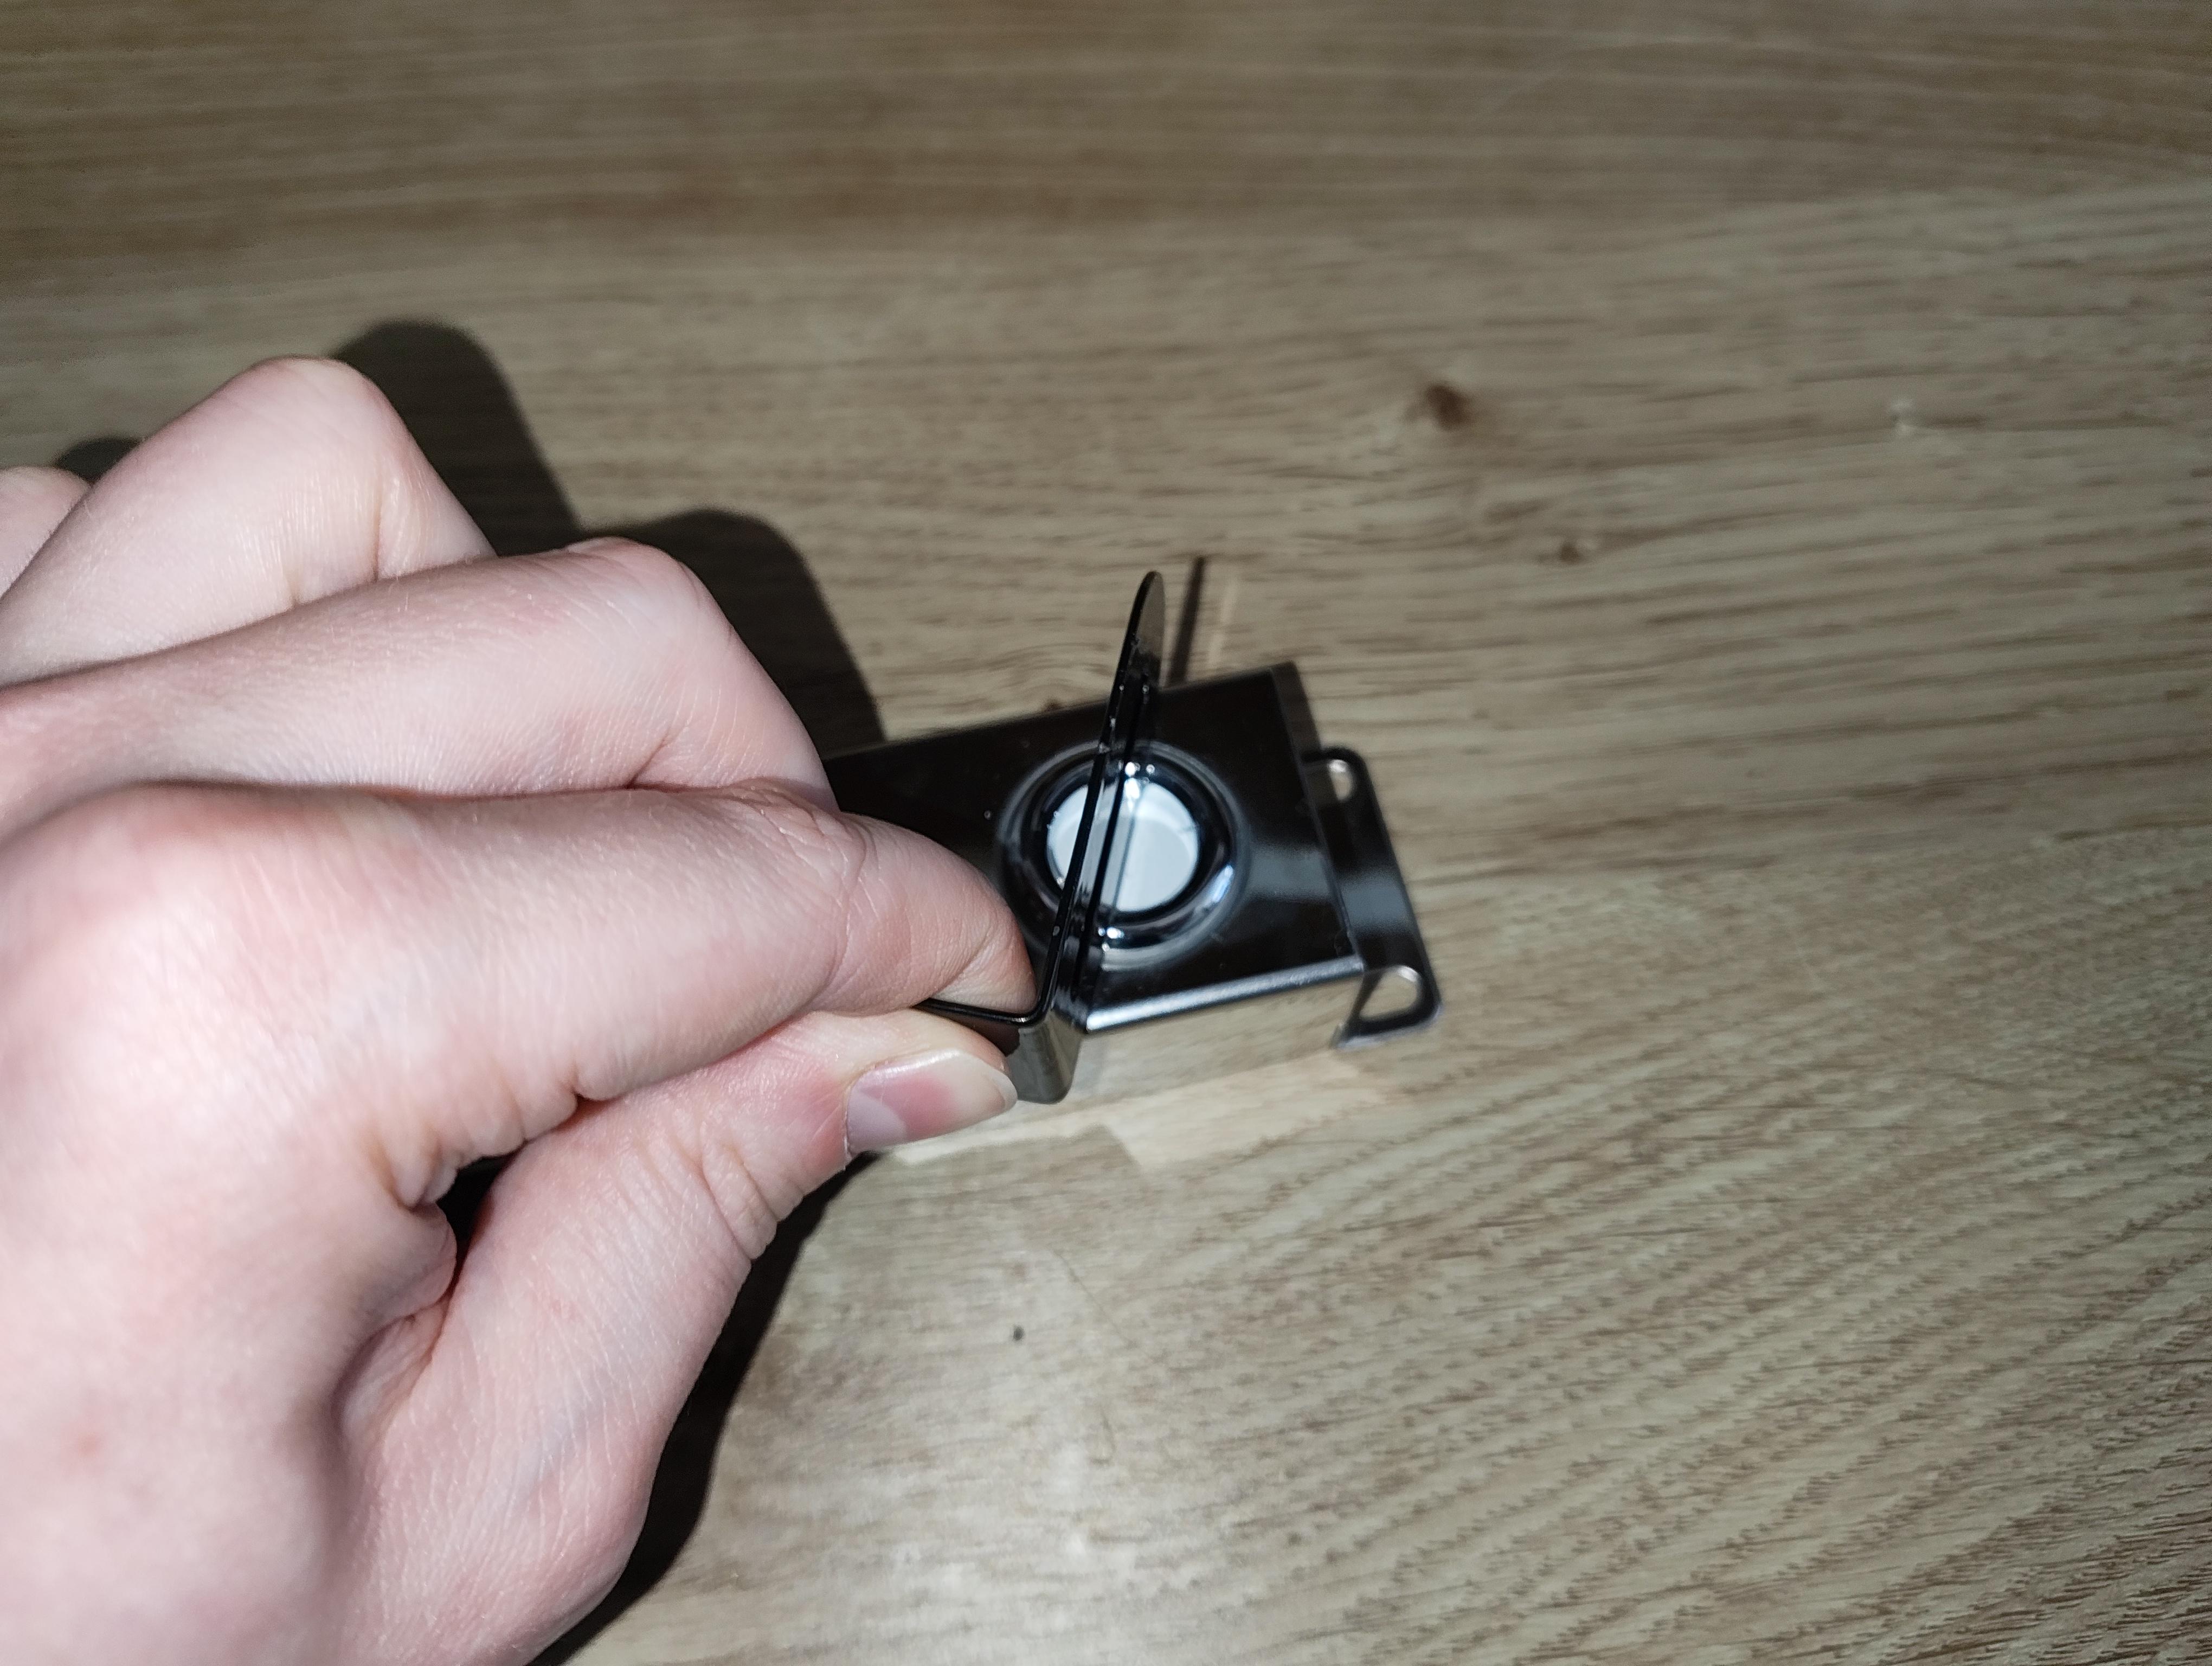
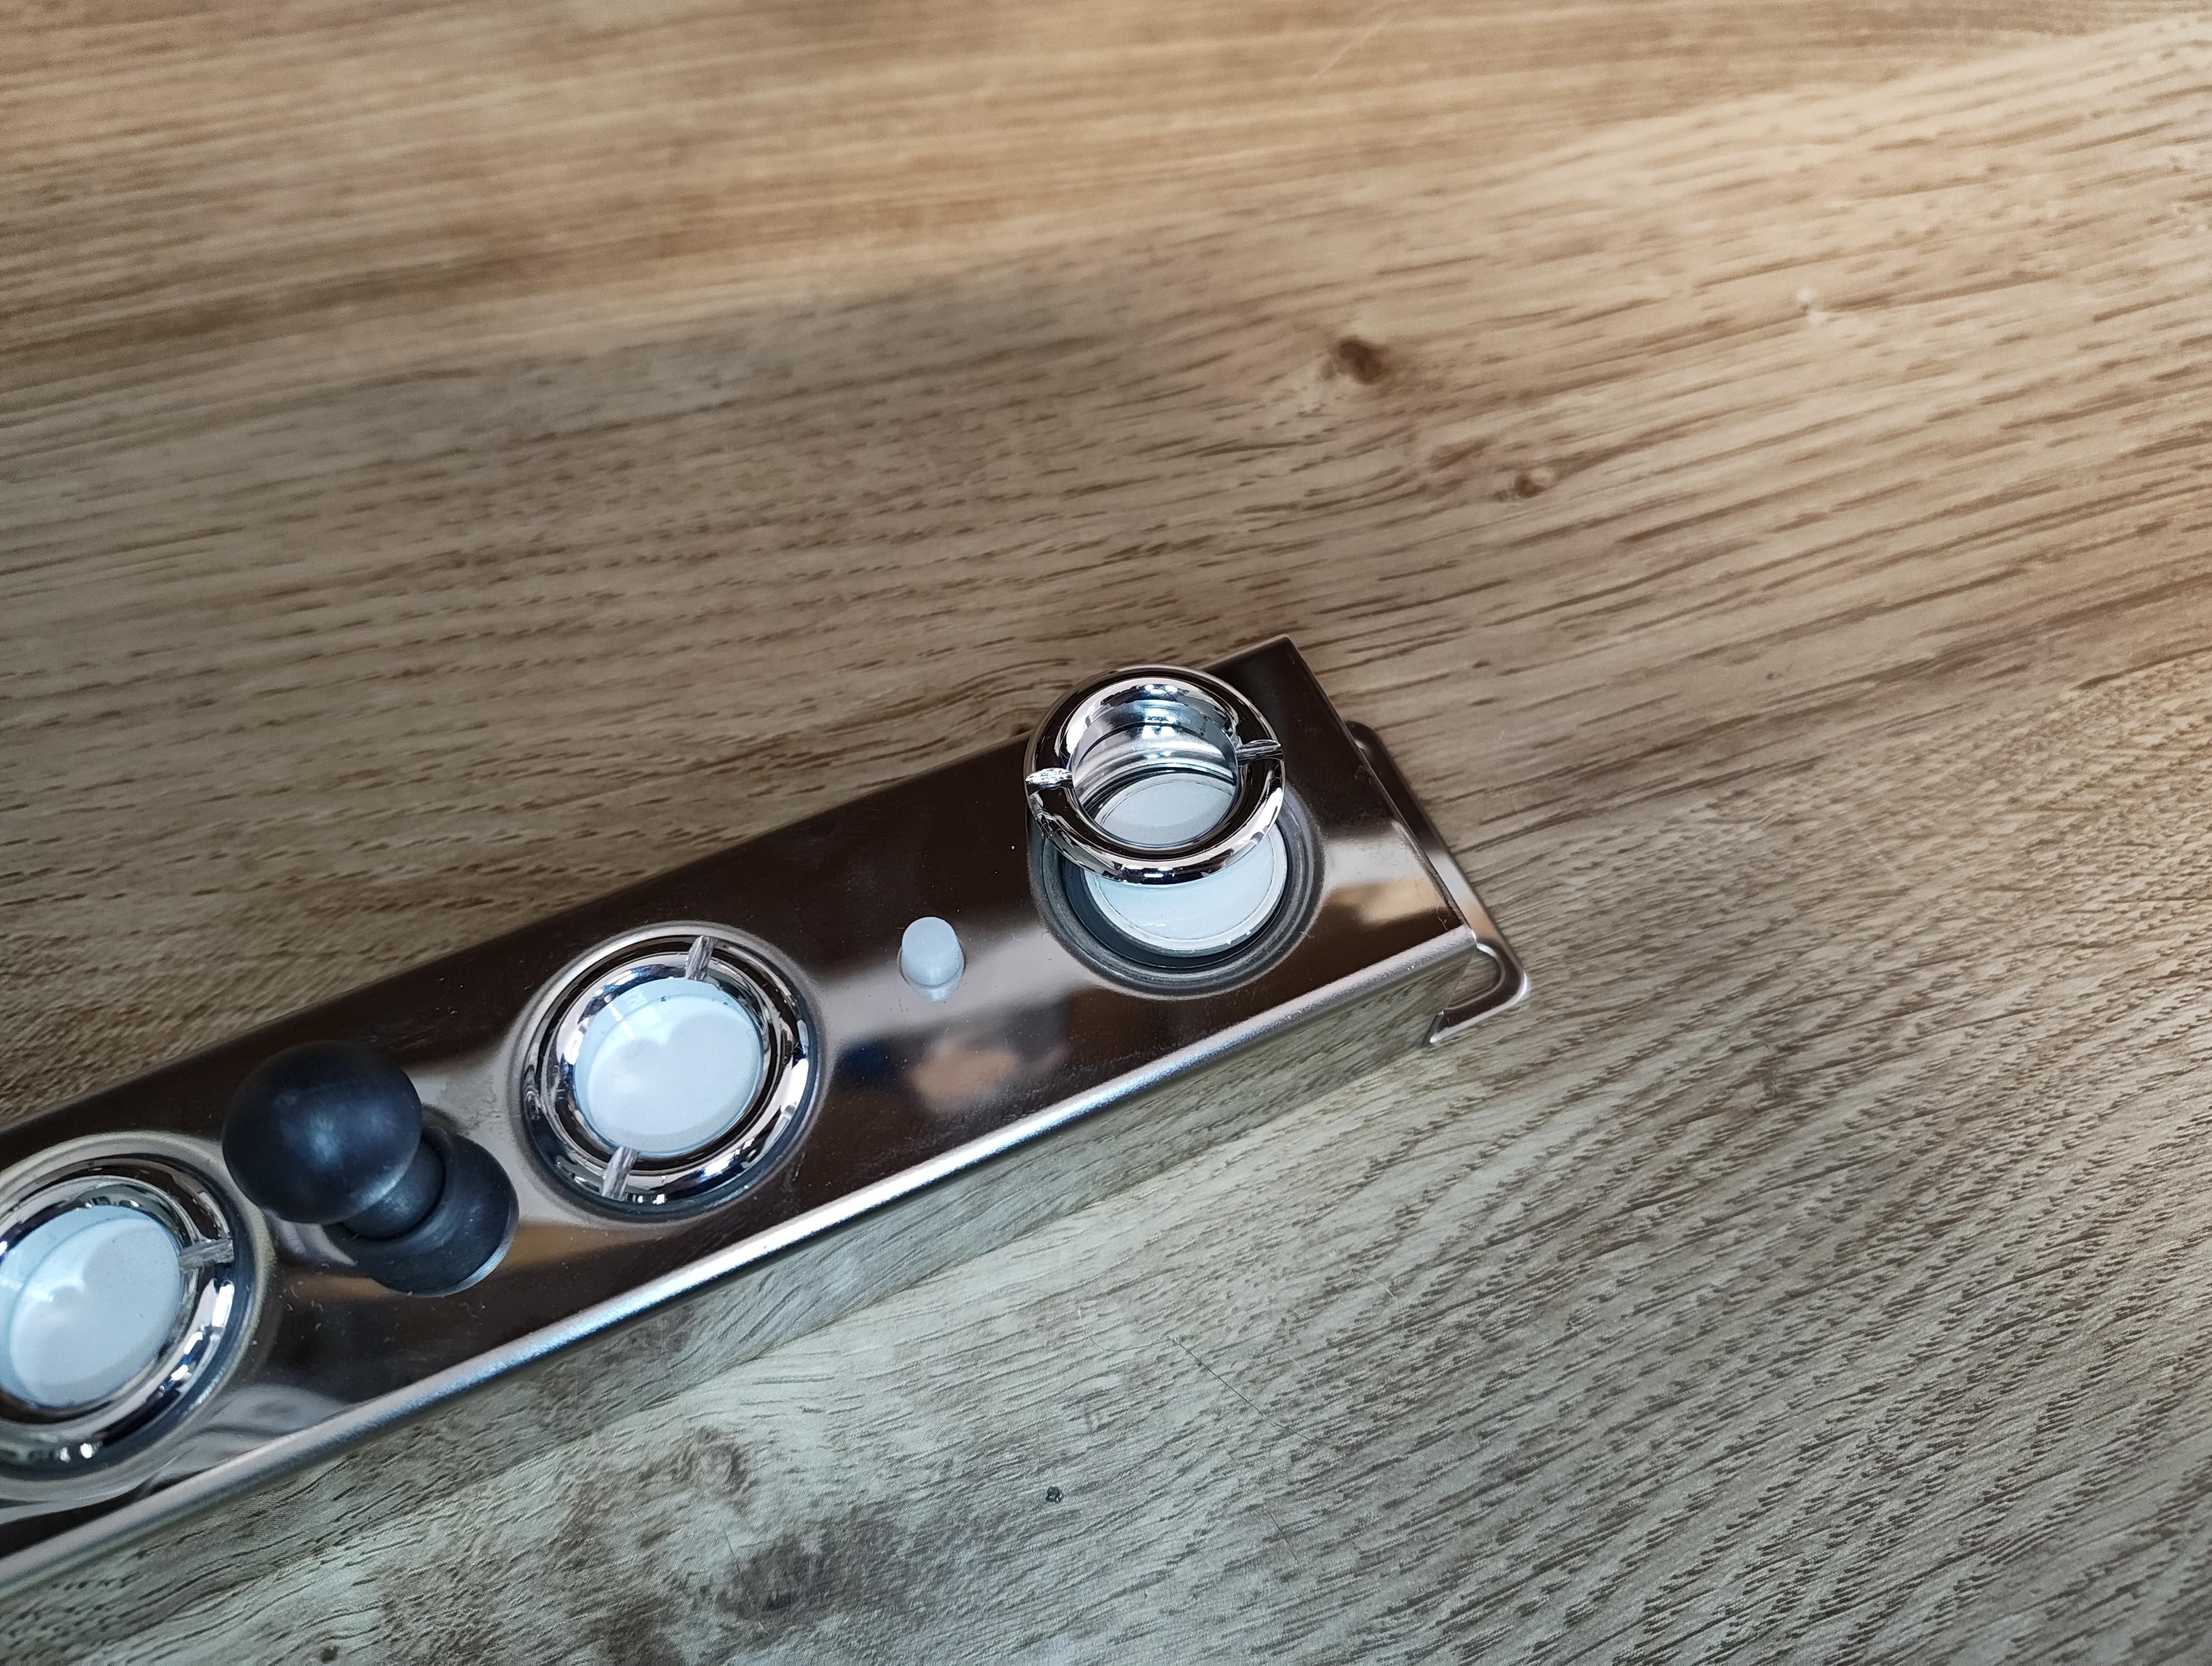
Step 6: Unscrew the collars
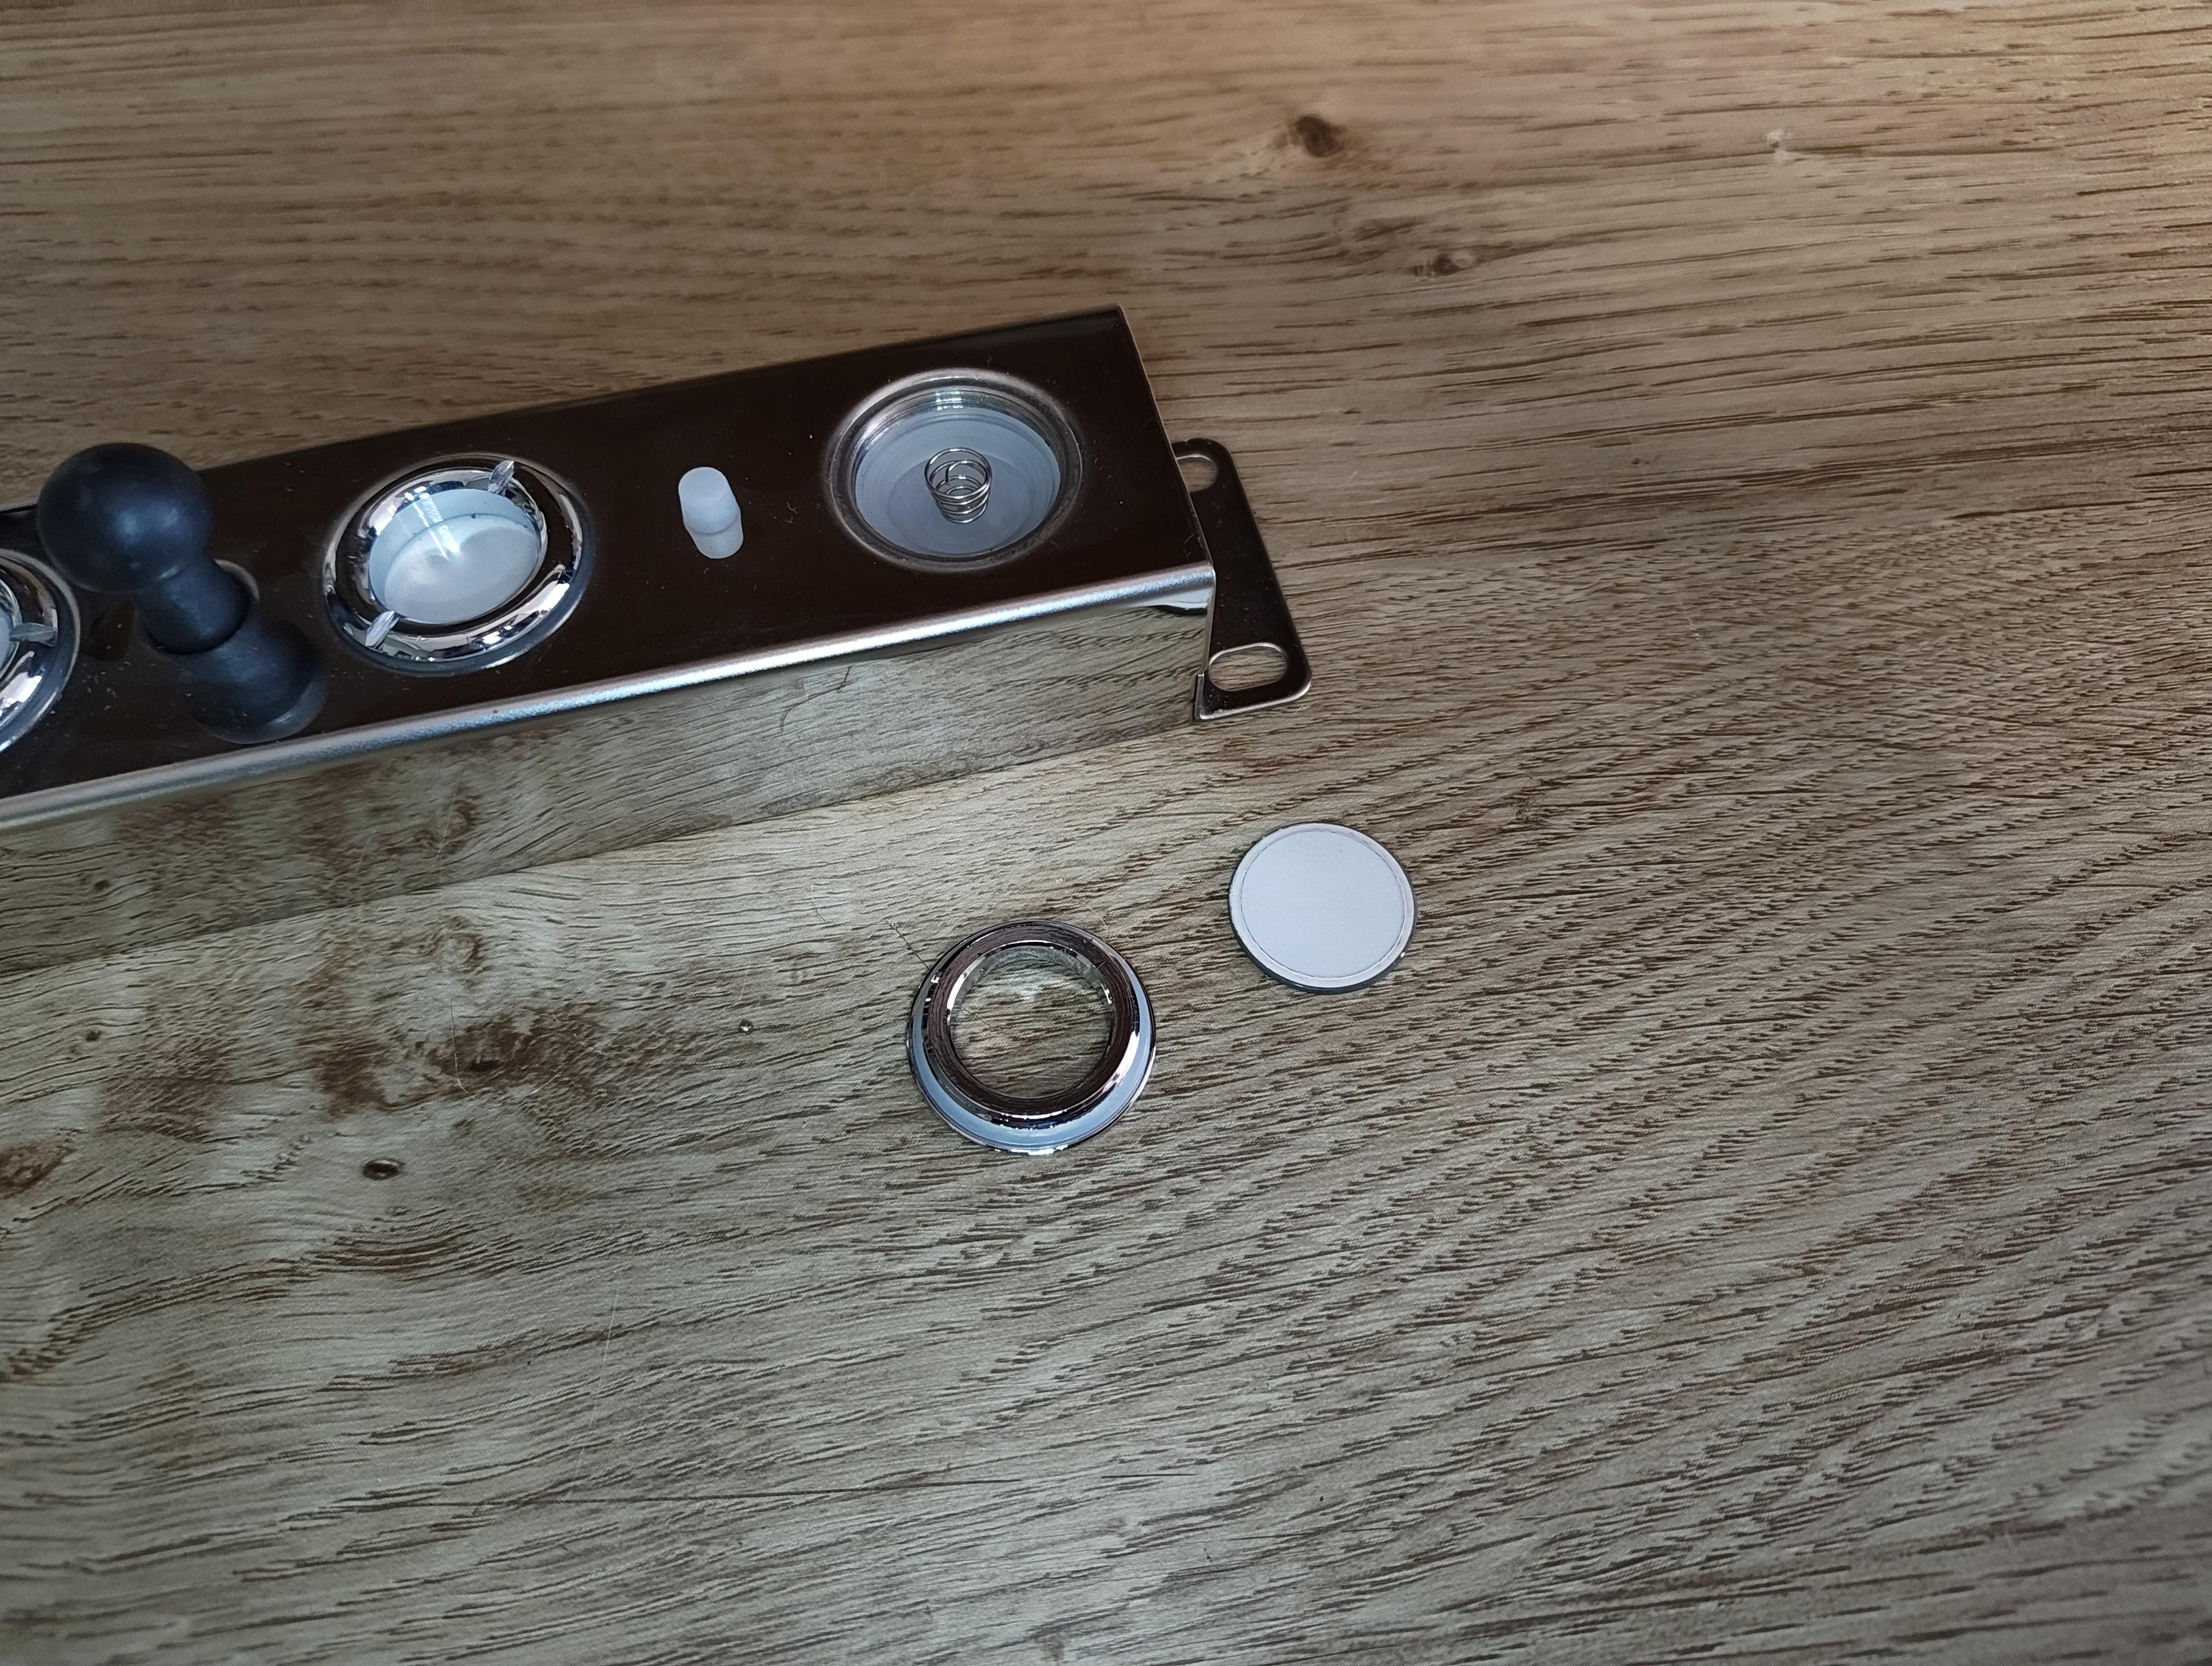
Unscrew all three collars and very carefully remove each disc, and handle each disc by its edge rather than its face. If a disc sits tight, slide a thin plastic card into the gap at the edge to work it loose.
Step 7: Check the discs and their seats
Poor contact between a disc and its seat is the usual cause. Take a photo of the bottom of each disc and of the seat it came out of. These are the photos we most want to see if you end up writing to us.
Look for:
Scale, mineral deposits, or dark spots on the back of the disc itself.
Anything trapped between the disc and the seat.
Visible damage such as a crack or a chipped edge.
Result: if the discs look intact, refitting them is often enough on its own. If a disc is cracked or chipped, it needs replacing. Either way, continue to Step 8.
Step 8: Refit, or replace
If the discs look intact, screw all three back into their seats. In most cases, taking the discs off and refitting them was enough on its own. Screw the collars as tight, so it doesn't leak.
If a disc is cracked or chipped, refitting will not bring it back. Order a fogger disc kit and fit the new disc in the same seat. If your Vext is under two-years old, get in touch with support@vext.fi for a warranty replacement.
Step 9: Put the fogger back
Set the fogger back into the fog tank from the left side. Refit the two screws on the left and right with the T10 screwdriver and tighten them. These screws keep the fogger from moving side-to-side, but do not stop it from slightly moving vertically.
Push the tube back under the top plate.
Step 10: Reinstall the fog tank and the plant wall
Hold the fog tank against the frame and line it up with the two screw holes. Refit both M3 screws with the T10 screwdriver, then tighten them.
Lift the plant wall back into place, then put the two pod holders back at the top.
Step 11: Plug the cabinet in and contact support
Plug the cabinet back in and turn it on. Then contact support with the following message and any images you took during the refit/replacement:
"Hi, I've just refitted/replaced my fogger discs, can you check wether it's running as it should?
My Vext app email is: [insert app email here]
I've also attached images below.
Thank you!"
Still need help?
Email support@vext.fi and send us:
Your photos of the discs and of the seats.
Whether refitting changed anything, and whether any disc looked cracked or chipped.
The email address you use for the Vext app.
With your app email address we can read your cabinet's actual power draw from our side, which tells us whether the fogger is running at full power.