
How to remove and reinstall the storage shelf
The storage shelf sits in the base of your Vext 2.0. It covers the electronics and holds your nutrient bottles and pod packages. Removing it is an advanced step. Do it only when Vext Support has asked you to, or when a replacement part you are installing requires it.
If you are not sure whether you need to remove the storage shelf, contact Vext Support first (support@vext.fi).
Removing the storage shelf
Unplug the cabinet before you begin. The electronics should not be powered while the storage shelf is off.
You will need the M3 torx key included with your cabinet.
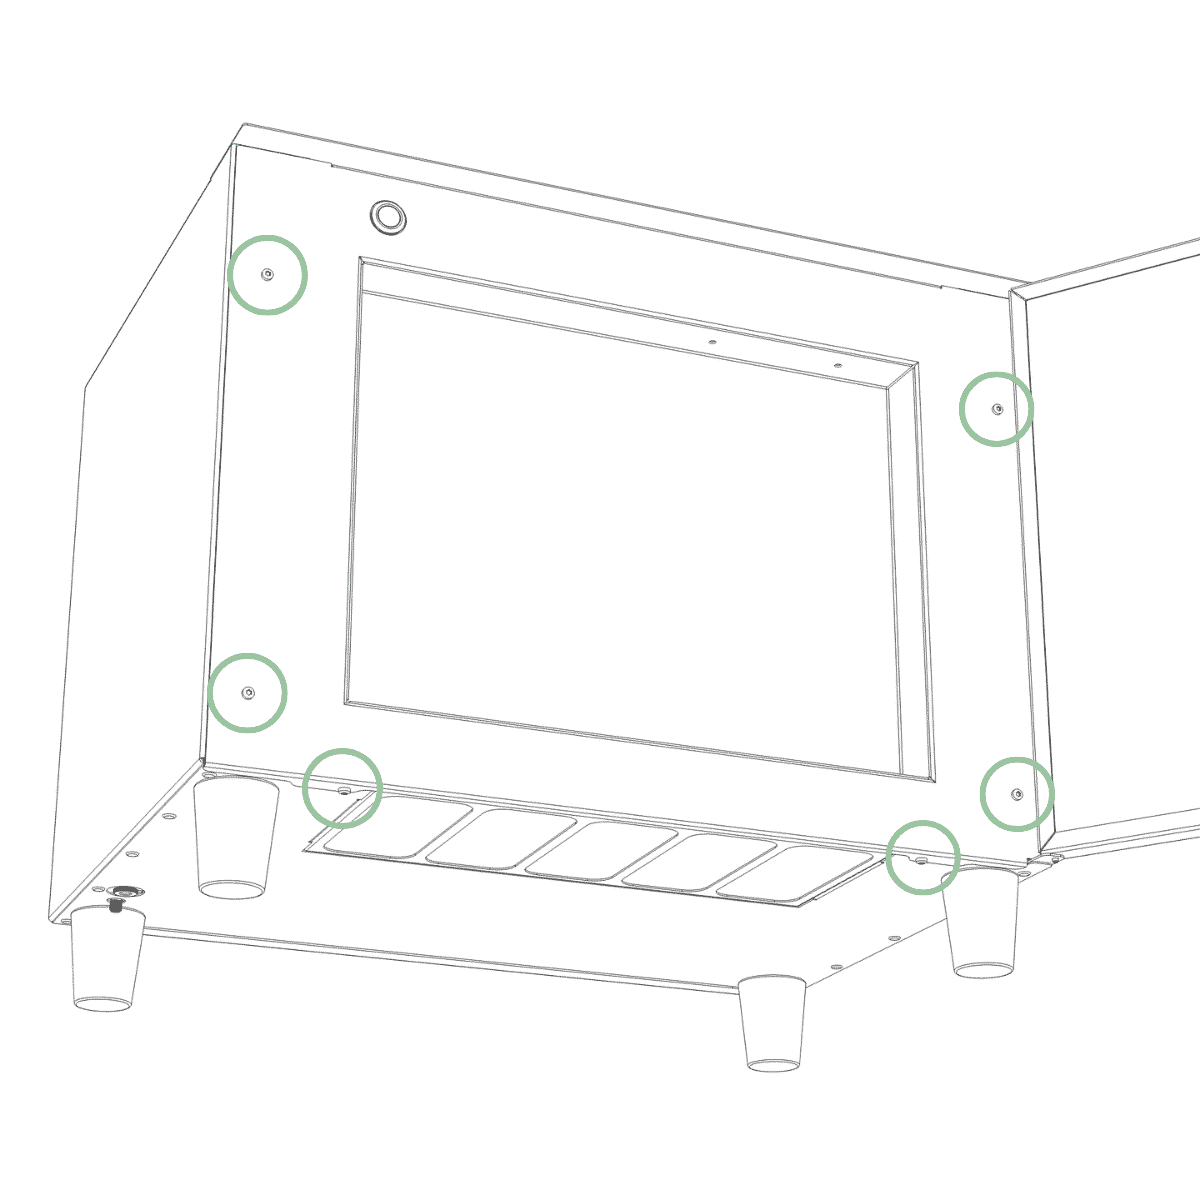
Step 1: Locate the six screws
The storage shelf is held by six screws: four on the front and two on the underside of the base. See the image for their positions.
Step 2: Remove the six screws
Remove all six screws with the included M3 torx key. Keep them together so you can refit the shelf later.
Note: Once the last screw is out, the storage shelf is no longer held in place. Hold it with one hand so it does not drop.
Step 3: Remove it without pulling the cables
The button cables and nutrient tubes stay attached to the storage shelf after removal. Remove the shelf slowly and do not pull on the cables or tubes, as tugging can damage them.
Tip: Rest the shelf next to the base so the cables and tubes stay slack while you work.
Reinstalling the storage shelf
Lift the storage shelf back into position, guiding the button cables and nutrient tubes in with it so nothing is pinched. Start all six screws by hand or gently with the tool before tightening any of them, so the shelf sits square. Tighten the six screws with the M3 torx key. Only plug the cabinet back in once you have finished any other work and the storage shelf is secured.
Tip: Before tightening, check that no cable or tube is trapped between the shelf and the base.
Still need help?
If anything looks different from these steps, or you are not sure how to continue, contact Vext Support (support@vext.fi) before going further.